"Map Network Drive and Disconnect a Mapped Drive in Windows 7"
Discover the beauty of map network drive feature in Windows 7 here!
If you always use a specific network drive or folder, you may want to connect to and use it permanently and easily just like it was a drive on your computer.
This special connection is called a "map network drive" in Windows. You also can disconnect the mapped drive as you wish.
Also, the beauty of network is that you can access a disk and retrieve files and folders from another computer, use a network printer, and access the Internet. You are freely to explore it.
To explore a network
Click Start, click Computer, scroll down the left-hand side navigation pane, and click Network to open it.
From the Network dialog box displayed, double-click one of the shared computers on your network. It will open and display the drives, printers, and other resources on that computer.
In the navigation pane, click the triangle next to one of the drives to open it, and then click one or more of the folders to see the files available to you.
Click Back one or more times, and then open other computers, drives, and folders to more fully explore your network.
Click Close to close Windows Explorer.
To set up a map network drive
Click Start, click Computer, scroll down the left-hand side navigation pane, and click Network to open it.
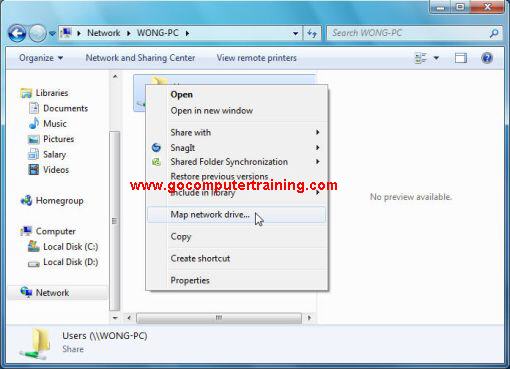
From the network resources box displayed, in the navigation pane, click the triangle opposite Network, and click the computer that contains the drive you want to connect to permanently.
Right-click the drive and from the menu opens, click Map network drive
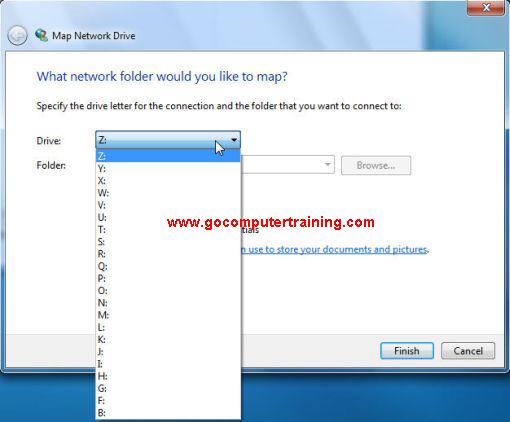
From the Map Network Drive dialog box displayed, select the drive letter you want to use for the mapped drive in the Drive: drop down menu.
You can choose whether you want to reconnect to the drive every time you log on to your computer, and whether you need to use different credentials (log on to that resource using a different user name and password).
Click Finish. The drive will open in a separate window. Close that window.
In the navigation pane of the original Windows Explorer window, click the triangle to the left of Network to close it. Then, if it isn't already displayed, click Computer to open that view. Both in the navigation pane and in the subject pane, you should see the new network drive.
To explore a network
Click Start, click Computer, and, if needed, scroll down the navigation pane so you can see your mapped drive(s).
In the navigation pane, right-click the mapped network drive, and click Disconnect. The drive will disappear from the navigation and subject panes.
Can't find what you're looking for? Try Google Search!
Microsoft Windows 7, Vista, XP, Microsoft Office Word, Excel, PowerPoint,
and Outlook are either registered trademarks or trademarks of
Microsoft Corporation in the United States and/or other countries.